Configuring UNIVERSE LTI 1.3 Assignment Tool for Canvas
Print
Modified on: Fri, 4 Aug, 2023 at 4:13 PM
Prerequisites for configuring LTI 1.3 Assignment Tool
The owner and admin of UNIVERSE account have configured tool permission while the teacher only has permission to add new assignments.
Don’t register this configuration more than once in your Canvas platform. Only the first one would be valid to use. If the admin wants to remove this tool, just delete them from developer key lists and contact your instructors to remove assignments related to this tool.
Launching the tool and opening UNIVERSE successfully requires users to download the newest version of UNIVERSE and open it at least once.
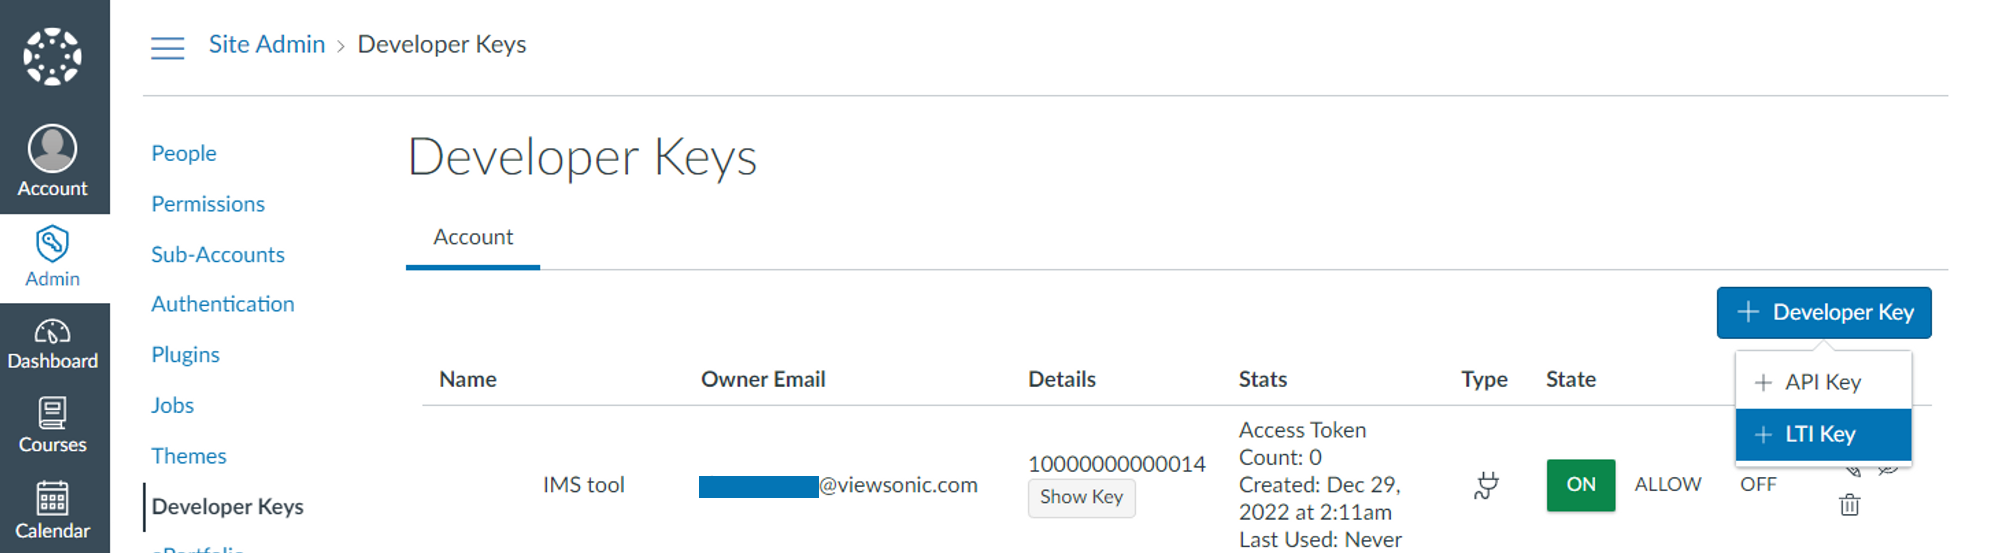
Step 1: Creating LTI key in Canvas
Log in to Canvas.
Click Admin, then click Developer Keys.
Click Developer Key and choose the LTI Key.
Choose the JSON method to create the integration:
Set Key Name to UNIVERSE: Assignment Tool.
Copy the following Redirect URL and paste it into the Canvas Redirect URLs field.
**<https://lynyzdngm5.execute-api.eu-central-1.amazonaws.com/dev/verify_id_token**>
Change the Method to Paste JSON.
 Copy the following JSON script and paste it to the LTI 1.3 configure field.
{
    "title": "UNIVERSE TOOL",
    "scopes": [
        "https://purl.imsglobal.org/spec/lti-ags/scope/lineitem",
        "https://purl.imsglobal.org/spec/lti-ags/scope/lineitem.readonly",
        "https://purl.imsglobal.org/spec/lti-ags/scope/result.readonly",
        "https://purl.imsglobal.org/spec/lti-ags/scope/score",
        "https://purl.imsglobal.org/spec/lti-nrps/scope/contextmembership.readonly",
        "https://canvas.instructure.com/lti/public_jwk/scope/update",
        "https://canvas.instructure.com/lti/account_lookup/scope/show",
        "https://canvas.instructure.com/lti/data_services/scope/create",
        "https://canvas.instructure.com/lti/data_services/scope/show",
        "https://canvas.instructure.com/lti/data_services/scope/update",
        "https://canvas.instructure.com/lti/data_services/scope/list",
        "https://canvas.instructure.com/lti/data_services/scope/destroy",
        "https://canvas.instructure.com/lti/data_services/scope/list_event_types",
        "https://canvas.instructure.com/lti/feature_flags/scope/show",
        "https://canvas.instructure.com/lti-ags/progress/scope/show"
    ],
    "extensions": [
        {
            "platform": "canvas.instructure.com",
            "settings": {
                "placements": []
            },
            "privacy_level": "public"
        }
    ],
    "public_jwk": {
        "e": "AQAB",
        "n": "5fq4SabbjsJAFJvdNW9-NA67eX0k-dhCXGUX2n-4V1GQ_T-6AyM0UzvFkPhbq-_LcDeFrdF8KVQR-Txy-IiYDIRvl9_Ik7ExnHj2wrBUzAvJK3Se8iiHWfOGMi_GTIcdbmJ2Qm3-Ye-V_DQQNCfaNPFS9978MXMo5KDZPPp2dlfUO07bGBiI-uDuy7KBTOwYmpMaGSPi_CXTpBCG9RoE20vKPlSWq_GnvvEHhR8QkMYDIGyAJ_uAPIK7fC0YucYOOdV4pntKfg7KhnWgHg3q-85FFe6bUO4AavQEI1hmUacfweJJaQ7xG48ry-78eMe5QCVdfLM3Y5CLFXwEXZKt2foVKqKR1B1HEvF4Q17JV-QJj0xPaF59Usb8kOor3k_GL2O-d3LeHGSTK4TouU6b2WXf8rUiTsPBVdJSt4DPXwzZgpZbh67AeQqVI3y-9jvFe7vR6tTarjO7steuA0EYuHDmt-6GvnXs3B8GQ9kCXLJKXvFe6x2NhpxeJLPCCMfA1bU8yJs5t3DiBzDaVtCrJKEy62QwpwsFHHV0gLtrO6JvjlVBNieLoieMpRVOJozakDWrZiObR3UbteHFoMKcdeVAsSCdnmAcIkVmnVHC4D6PKEl7XelJcDTbB95GPqCshVzQ5zx5wQRD1v6Dl0SS9wfIMiLGl_leYK-Vyki9kJE",
        "alg": "RS256",
        "kid": "c4d8bf5e-3cc1-4b42-bf56-2aa2fe2c1c39",
        "kty": "RSA",
        "use": "sig"
    },
    "description": "UNIVERSE TOOL",
    "custom_fields": {},
    "public_jwk_url": "https://lti-public-key-json.s3.eu-central-1.amazonaws.com/lti_public_jwk.json",
    "target_link_uri": "https://www.viewsonic.io/",
    "oidc_initiation_url": "https://lynyzdngm5.execute-api.eu-central-1.amazonaws.com/dev/lti_tool_init_login"
}
Click Save.
Set the developer key State to ON.

Step 2: Create app (for admin)
Log in to Canvas.
Click Admin, then click Settings.

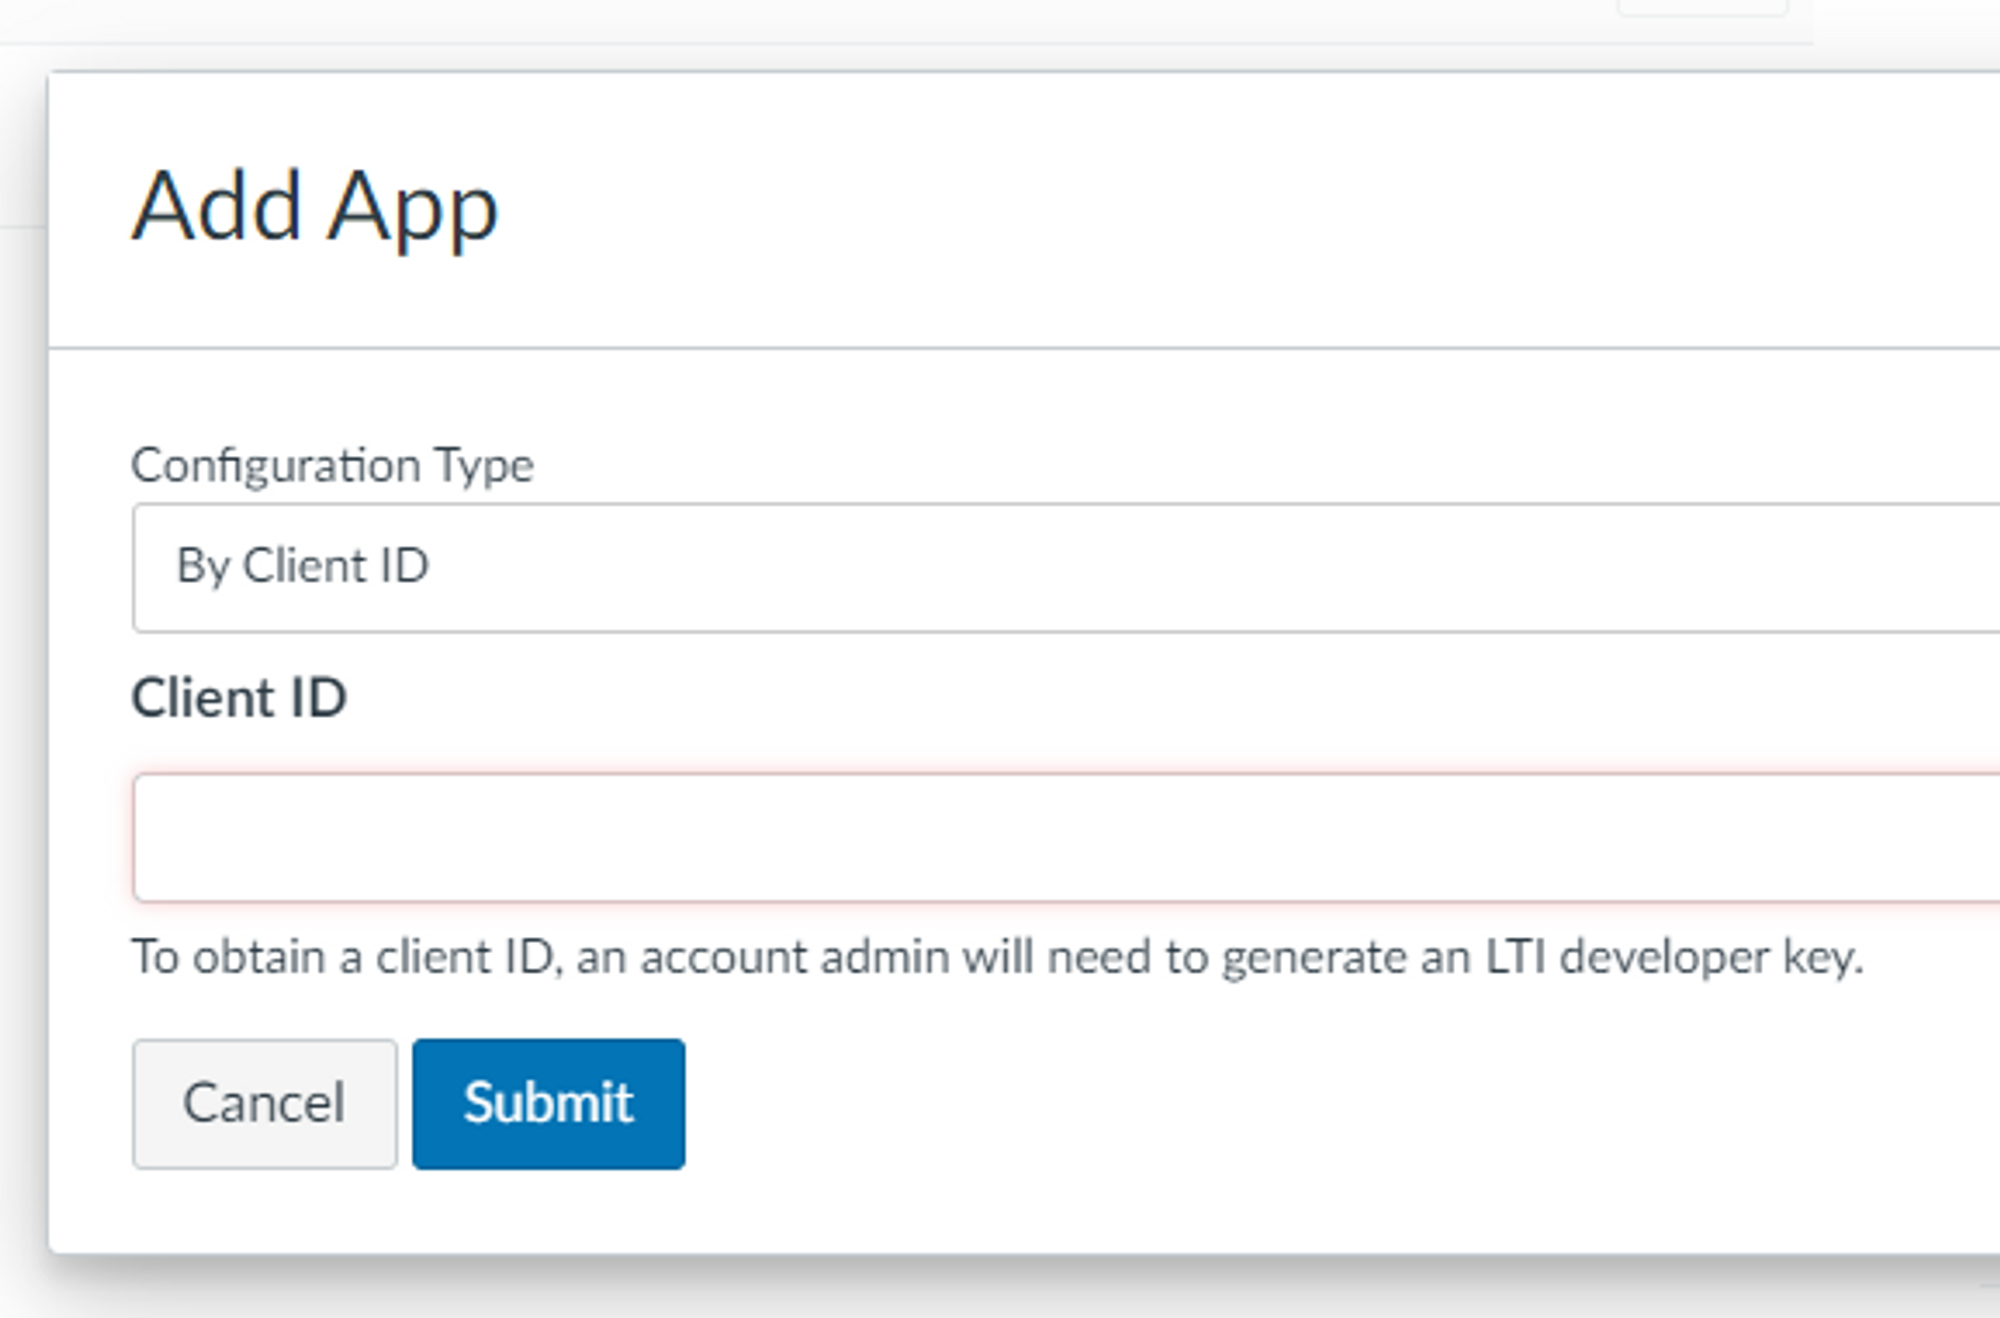
Click + App, then the Add App screen will appear as below.

Change the Configuration Type to By Client ID.
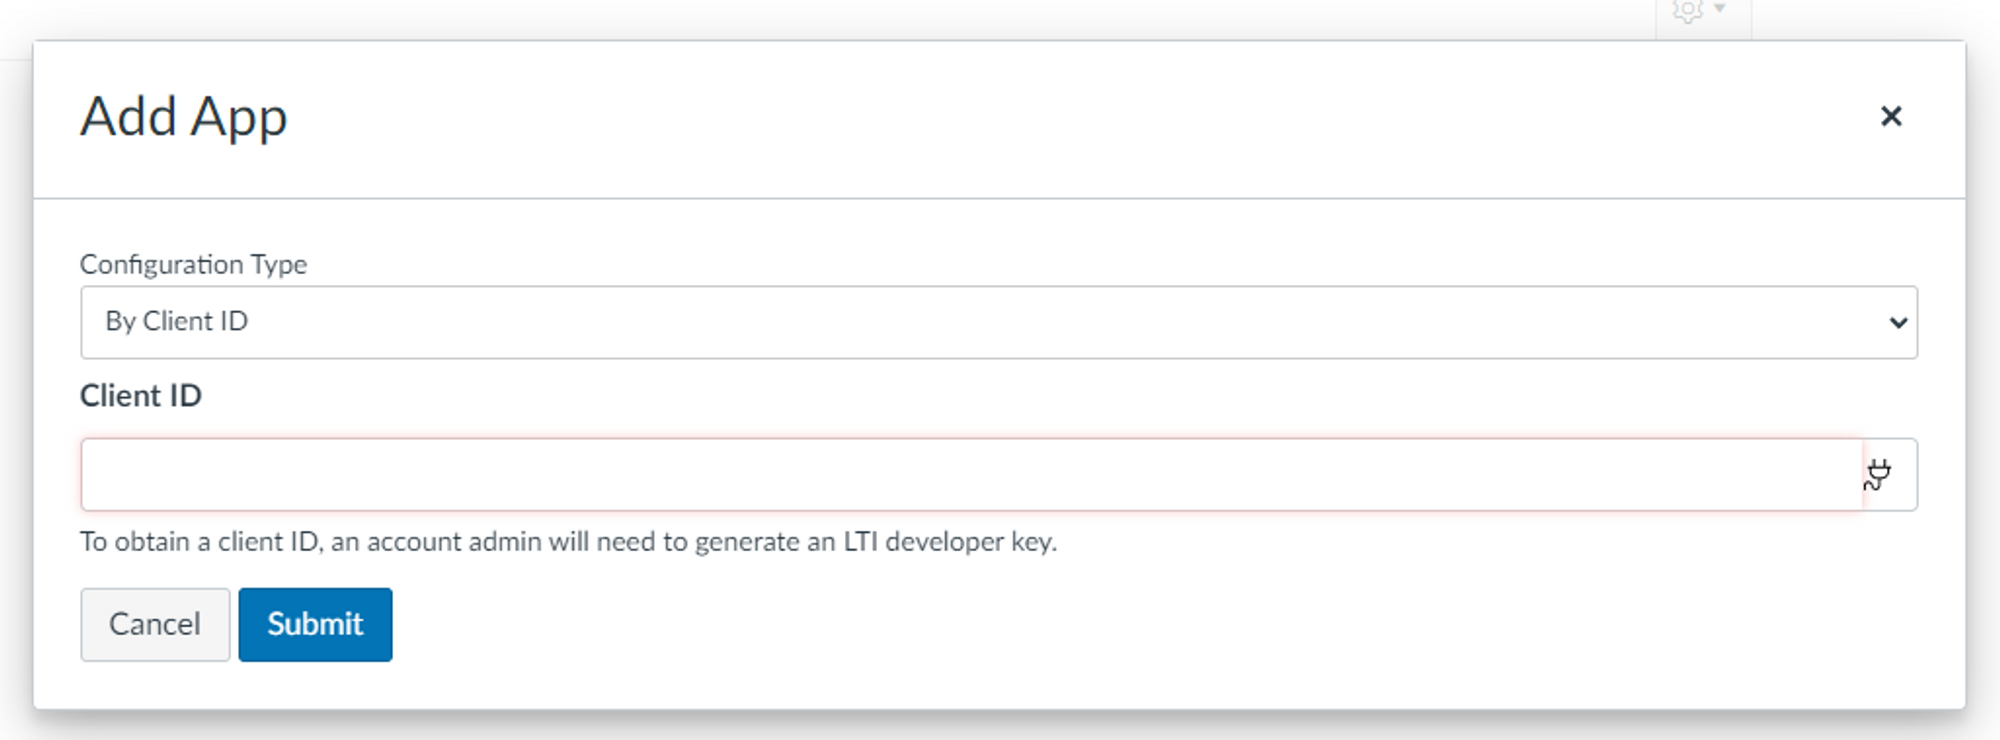
Copy the Developer ID from the Canvas LTI Developer Key and paste it into this Client ID field.

Click Submit, then click Install.

Step 3: Register information in UNIVERSE Manager
Log in to UNIVERSE Manager.
Click the LTI Settings from the navigation.
Set the Assignment State to ON.
Click Add Instance, then select Type to Assignment.
The Add Instance screen will appear below.

Where can you get the information to enter in each field?
Site Domain
The domain of your Canvas site.
* Make sure the copied link is without a slash at the end of the site domain.

Client ID
The Details from the Canvas LTI Developer Key for LTI 1.3.
* This should already be configured.
Deployment ID (refer to Step 2 Create App)
The Deployment ID from the External Apps in Canvas Settings.

Note
The optional field allows you to write down any notes as reminders.
Copy the Deployment ID to teachers for entering External tool URL field when adding assignments.
Step 4: Enable assignment feature in UNIVERSE manager
Log in to UNIVERSE Manager.
Click the LTI Settings from the navigation.
Set the Assignment State to ON.

Step 5: Install the app in Canvas course (for the instructor)
Log in to Canvas.
Click Course, then click Settings.
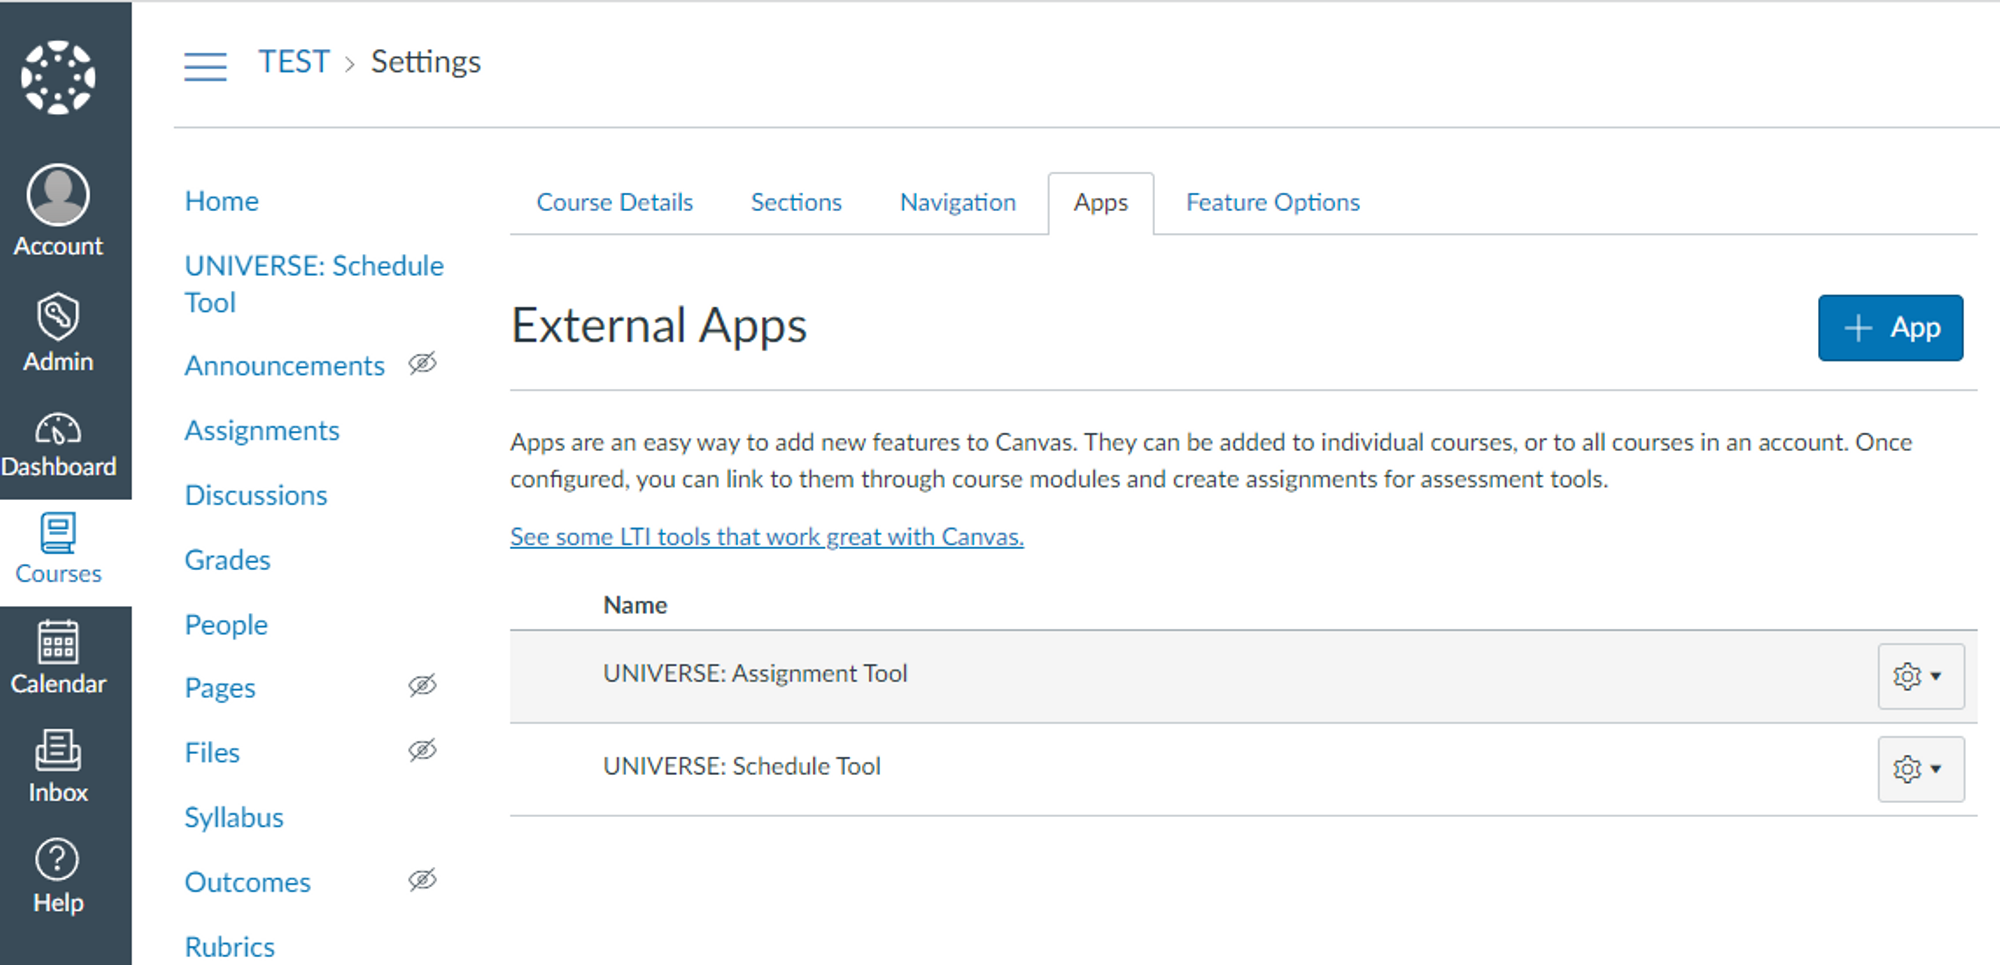
Click + App.
Change the Configuration Type to By Client ID.

Copy the Developer ID from the Canvas LTI Developer Key and paste it into this Client ID field.

Click Submit, then click Install.
Step 6: Add an external app as an assignment (for the instructor)
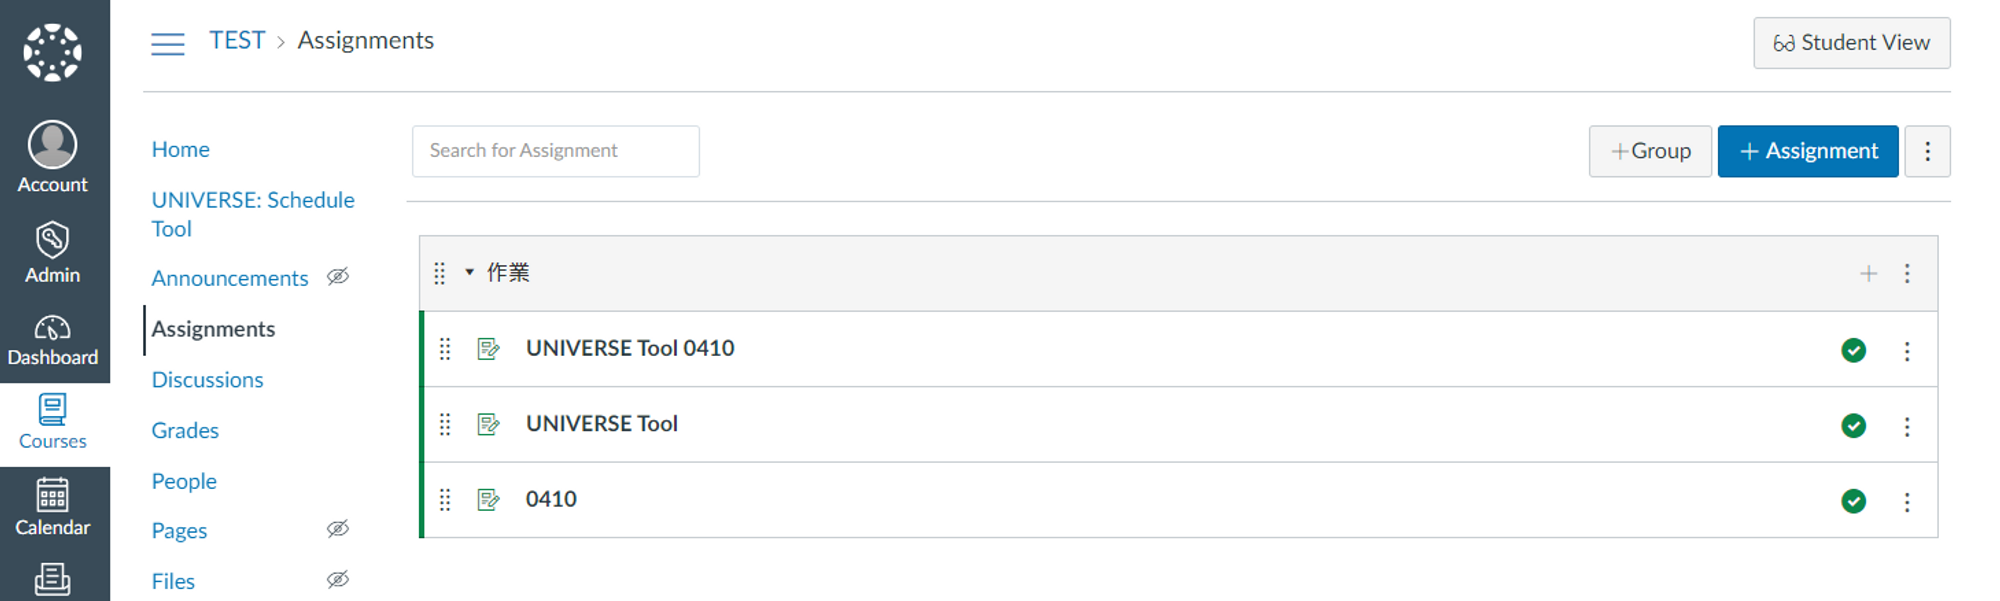
Log in to Canvas.
Click Assignment, then click + Assignment.
Change the Submission Type to External Tool.
Copy the Share assignment link from UNIVERSE Manager.

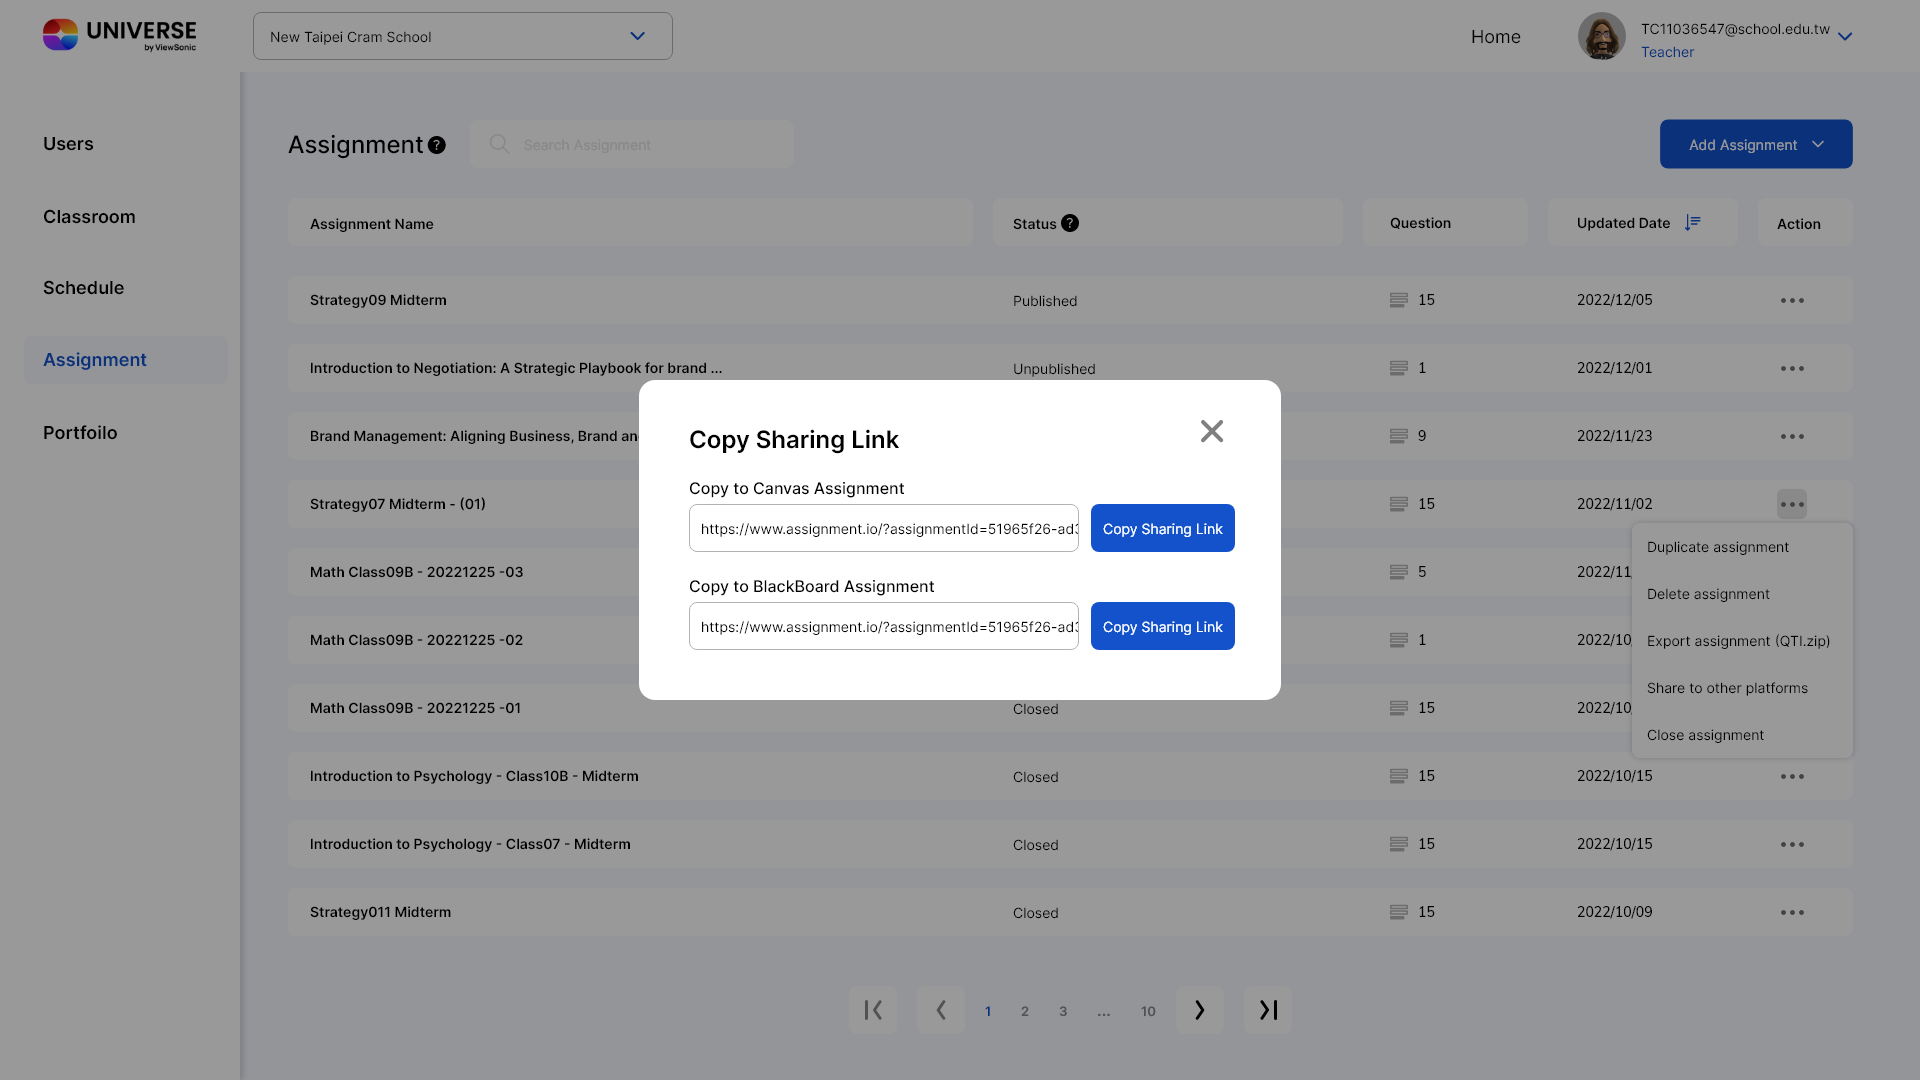
Paste the sharing link to this URL field.

Save and publish the assignment.

Step 7: Launch the tool
Find the UNIVERSE Assignment Tool from your menu.
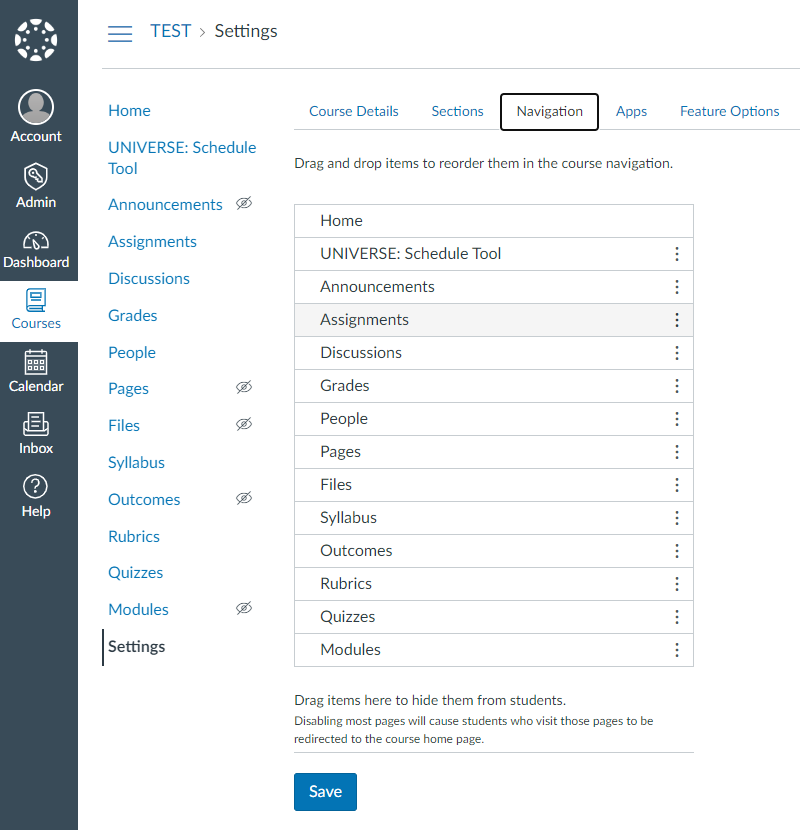
Manage your navigation from "Settings".
Did you find it helpful?
Yes
No
Send feedback Sorry we couldn't be helpful. Help us improve this article with your feedback.